The OCR notebook
Using the OCR notebook on Colab
You can find the OCR notebook here on GitHub.
Objectives
After using the OCR notebook you will have accomplished the following:
About Google Colab
Google Colab is a Jupyter Notebook that runs on Google’s servers, allowing you to run Python code on data calculated and stored on cloud servers. This is great for large, computationally heavy projects where processing can be increased easily with a few lines of code. Unlike Jupyter notebooks run locally on your computer, the Colab environment is independent of your locally installed environments, meaning that you are less likely to run into conflicts. The downside to the Google Colab environment is that any information created in Colab is erased when you close the browser, unless you save it somewhere, like GitHub or locally on your computer.
Process guide for the OCR notebook
Step 1:
There are two ways to open the OCR notebook:
open through Github [insert screenshot] - you will use this process the first time opening the notebooks.
- Save a copy of this notebook to your Google Drive. All changes will be saved to your own copy.
Open through Colab [insert screenshot] - You can use this process if you have previously saved it to your Google Drive.
In Colab, go to File>Open. This will open a dialog box.
At the top tabs of the dialog box, select Google Drive - you should see your previously saved copy.
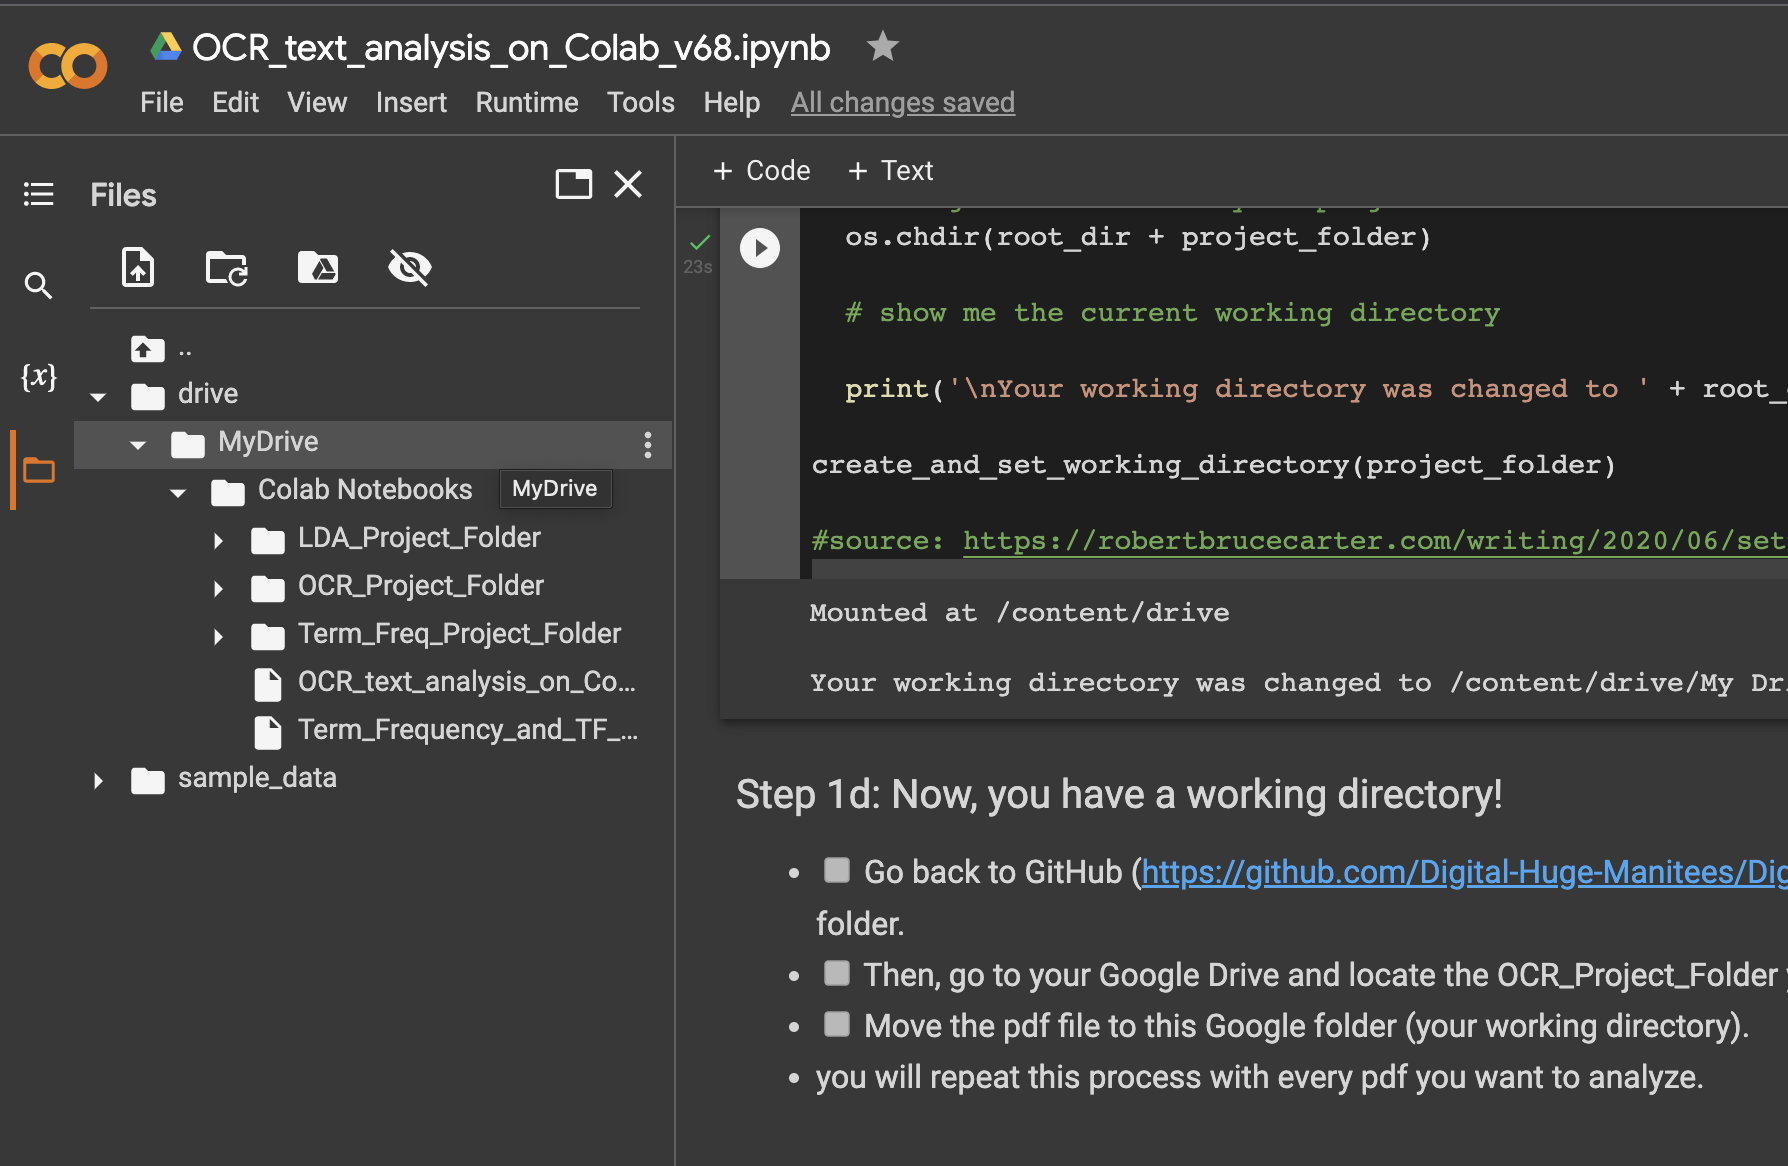
Run the first cell - this will connect to your Google Drive. A dialog box will open and ask you to select your Google account and ask for your permission to connect to your Google Drive.
It will also create a new directory in your Google Drive for all of the files needed for this project. You should see something like this indicating your new working directory.

Follow the steps for 1d to put the scanned pdf files into the working directory. Colab has a file manager on the left hand side that will allow you to drag and drop files to the working directory, OCR_Project_Folder.
Step 2:
Install the dependencies and import the libraries. IF you have run this before, you may find that the runtime needs to be restarted. Its ok to do this. Just click the Restart Runtime button provided. Rerun the cell again to made sure everything has been imported.
Step 3:
This step gathers any and all PDF files you have placed in the working directory. What you are first starting, it is recommended that you only do one at a time, if you are working with multipage PDFs, such as those from the Gazette archives.
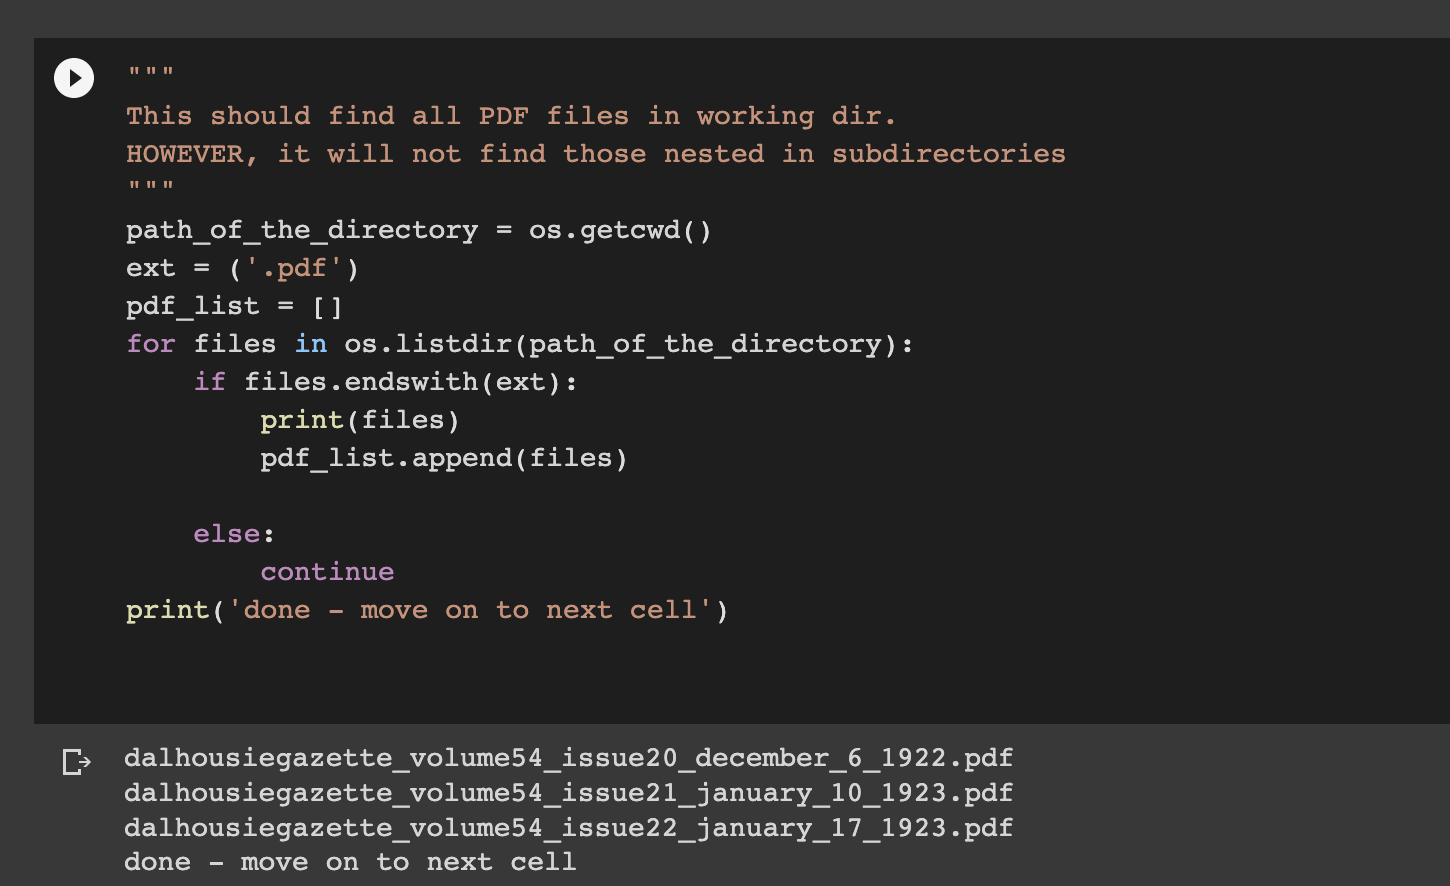
IF you are running this analysis again, make sure you have cleaned out previous PDFs and only have the ones you want in the working directory.
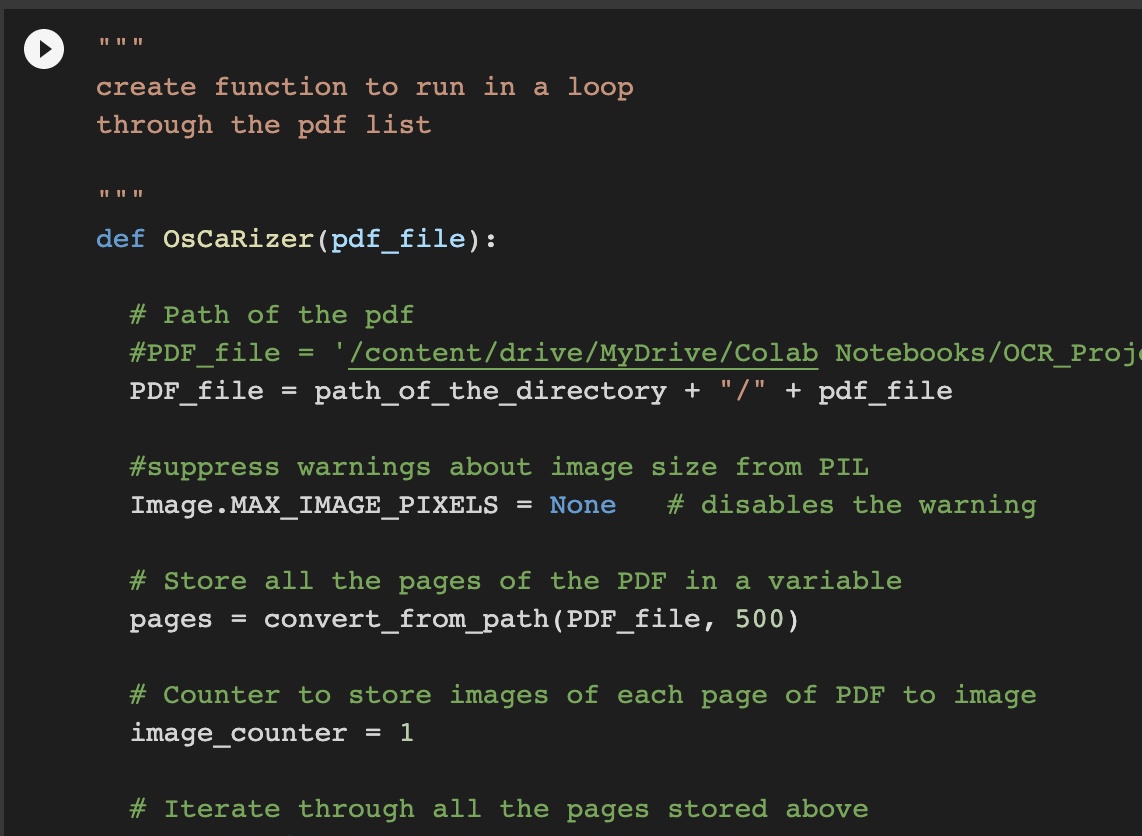
The second cell creates the OsCaRizer function. This does all of the analysis on the PDF.
Step 4:
Run this cell to take each image file and create text in a .txt file format. The output file will have the same name as the input file, but with a .txt extension.
Managing output from the notebook
Unlike your own computer, Google Colab does not save anything in memory. However, since you’ve saved everything to your Google Drive, such as your results, these files will be saved indefinitely.
The PDF file and the output .txt files should be moved out of the working directory to a safe place, such as another Google Drive Directory. You will likely be using these in the next notebook for LDA.
The image files may remain as it is safe for them to be overwritten.
Future improvements & applications
Even for those scholars that prefer close reading, the OCR process can make reading primary texts easier as it converts scanned images into searchable text.
As a raw text file, there are improvements that can be made to this notebook. Improvements could be:
keep articles continuous as they are often split across pages in newspapers.
identify image placements with placeholder text.
combine with image classification methods that identify and provide context for image and text together.
identify other aspects of the artefact, such as damage locations or typefaces.